AI Lines Tool #
The AI Lines Tool is where you “teach” the AI cars to drive, by giving them some basic information about how to drive around your track!
DEVELOPMENT NOTE #
The user interface for the AI Line tool is currently in the process of being improved - it will be easier to use and understand in the future!
AI Line Types #
There are two kinds of AI Line:
- Racing - the line the cars follow during the normal course of a race.
- Pitlane - the line a car follows when it is damaged, out of fuel, or has worn out its tyres and needs to make a pitstop.
The type of AI line you are working on can be selected from the properties sidebar of the AI Lines Tool.
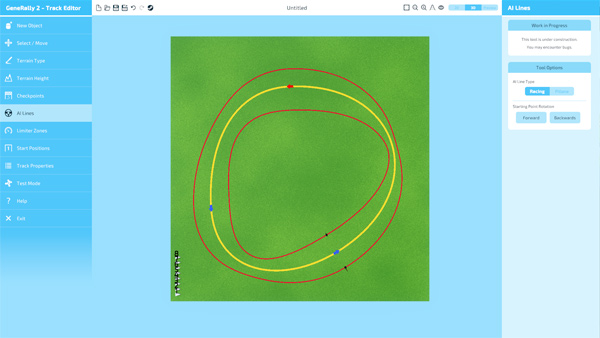
Anatomy of an AI Line node #
This applies to Racing nodes only.
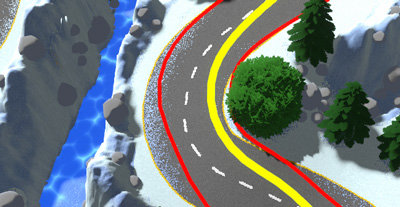
The AI Line nodes in GeneRally 2 consist of a point, which is indicated by an arrow (which can either be blue or red) - and two “handles” which are designated by two small, red flags.

The arrow indicates the “racing line”, the part of the track where the cars should normally try to drive - and the flag markers denote the edges of the available track. Ordinarily, you should place the arrow on the racing line and the flag markers at the edge of the track. Something like this…
Placing AI Nodes #
To place a node in the AI line, simply hold Ctrl and click on the terrain to spawn a new point. This point will be automatically inserted before the node marked in red.
The node marked in red is the starting point of your AI line, and all cars will head towards this node at the start of the race.
Once your node is placed, you can click on the flags to rotate the node in the correct direction (the arrow should point in the direction the track is going) and to define the edges of the track (as described above).
Alternatively: Clicking, holding and dragging in the direction the node should point, when placing an AI node, will allow you to do these two steps together.
Adjusting AI Nodes #
To adjust an AI line node you’ve already placed, simply click on it.
To change where a node is inserted, you need to move the red node. This is achieved by “rotating” it using the controls in the properties sidebar. You can rotate the node Forwards or Backwards.